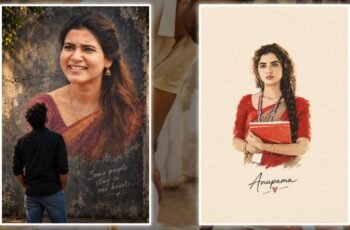
A Cinematic Portrait Edit makes an ordinary photo feel like a still frame from a film. It adds mood, depth, controlled color, and storytelling. Think of it as turning a snapshot into a movie poster: the person stays real, but the atmosphere becomes unforgettable. In this guide, you will learn how to create a Cinematic Portrait Edit step by step, even if you use a phone or free editing app.
What Is a Cinematic Portrait Edit?
A Cinematic Portrait Edit is a photo-editing style inspired by film visuals. It uses soft shadows, rich contrast, intentional color tones, and a strong focal point to create emotion. Instead of making a portrait look overly bright or artificial, you guide the viewer’s eye toward the subject.
Imagine your photo as a stage. The subject is the actor, the background is the set, and your editing choices are the lighting director. A good Cinematic Portrait Edit does not shout for attention; it quietly builds a story. Cool shadows can feel mysterious, while warm highlights can create comfort and nostalgia. Many cinematic portraits use teal-and-orange contrast because it separates the subject from the background while keeping skin tones warm.
Why the Cinematic Portrait Edit Style Works
The Cinematic Portrait Edit works because it controls attention. Our eyes naturally move toward light, contrast, and color differences. When you darken distracting areas and gently highlight your subject, the portrait feels purposeful rather than random.
This style also creates emotion. A moody blue grade may suggest loneliness or mystery. A golden, warm grade may feel romantic or nostalgic. Film-inspired portraits often rely on dramatic shadows, controlled tones, and thoughtful composition to suggest a story.
You do not need expensive gear. You need a clear subject, decent light, and patience. A Cinematic Portrait Edit is like cooking: the ingredients matter, but seasoning makes the dish memorable. Start subtle, taste the result, and adjust slowly.
Start With the Right Photo
Every strong Cinematic Portrait Edit begins with a suitable base photo. Look for clear eyes, natural expression, and simple separation between the subject and background. Busy backgrounds can still work, but they need stronger editing control.
Shoot near a window, during golden hour, or in soft shade. Avoid harsh midday sunlight because it creates sharp shadows on the face. If you shoot indoors, position your subject beside a window rather than directly under a ceiling light.
Use portrait mode if your phone has it, but do not depend on artificial background blur. A cinematic image needs believable depth. Keep the original file safe, shoot in RAW when possible, and avoid heavy filters before editing. A clean photo gives your Cinematic Portrait Edit room to breathe.
Fix Exposure Before Color
Before adding any cinematic color, correct the basics. Exposure is the foundation of a Cinematic Portrait Edit. If the face is too dark or the background is blown out, no preset can fully save it.
Start by adjusting exposure so the subject’s face looks natural. Then reduce highlights if bright areas lose detail. Lift shadows slightly to reveal information, but avoid making the image flat. Add a little contrast to restore depth.
A useful approach is a gentle S-curve: lift shadows slightly, protect midtones, and soften highlights. This creates film-like contrast without crushing details. Think of exposure correction as cleaning the canvas before painting. Once light looks balanced, your Cinematic Portrait Edit becomes much easier.
Master Cinematic Color Grading
Color grading is the heart of every Cinematic Portrait Edit. It changes the emotional temperature of the image. The popular cinematic look often places teal or blue in the shadows and warm orange tones in the highlights or midtones.
Use the color grading wheels carefully. Add a small amount of teal to shadows, then introduce soft orange or amber into highlights. Keep the strength low at first. Your goal is atmosphere, not a heavy Instagram filter.
Protect skin tones throughout the process. Skin usually sits in the orange range, so excessive teal can make faces look unhealthy. Warm midtones can flatter skin, while cooler shadows add cinematic depth. A balanced Cinematic Portrait Edit feels rich, not colored over.
Refine Skin Tones Naturally
Natural skin is essential in a Cinematic Portrait Edit. If skin becomes plastic, gray, orange, or overly smooth, the cinematic illusion breaks. Your subject should look polished, not edited beyond recognition.
Use masking tools to select the face and body skin separately. Reduce texture and clarity gently; many editors start around negative texture and mild negative clarity, then adjust based on the photo. Avoid smoothing every pore. Keep natural details around the eyes, lips, and hairline.
Next, adjust orange saturation and luminance. Slightly lowering orange saturation can reduce redness, while raising orange luminance can brighten the face. A healthy Cinematic Portrait Edit keeps skin warm, clean, and believable. Treat skin like silk: smooth the rough edges, but preserve its texture.
Use Shadows, Vignettes, and Depth
Depth turns a flat portrait into a Cinematic Portrait Edit. Shadows create mystery, while controlled vignettes pull attention toward the subject. Do not darken the entire frame; shape the light with intention.
Add a soft radial mask around the face or eyes. Increase exposure slightly in that area, then reduce exposure around the edges. This creates a natural spotlight effect. You can also lower clarity near the edges to create a dreamy background transition.
Lift blacks slightly if you want a faded film look. Pure black can feel digital, while lifted shadows often feel softer and more cinematic. Think of shadows as curtains in a theatre: they frame the performer without stealing the scene. A subtle vignette completes the Cinematic Portrait Edit.
Add Film Grain and Final Polish
The final stage of a Cinematic Portrait Edit adds texture and cohesion. Film grain gives digital photos a tactile, analog feeling. Use it lightly, especially on portraits, because heavy grain can distract from facial details.
Check the image at full size. Look for harsh edges, strange skin colors, unnatural sharpening, or distracting bright spots. Reduce saturation slightly if the colors feel too loud. Then apply mild sharpening only to the eyes, eyebrows, and important details.
You can also use a subtle glow on highlights for a dreamy finish. Keep the effect gentle; cinematic images usually feel controlled, not glowing like a fantasy filter. Export in high quality, then compare the final result with the original. A successful Cinematic Portrait Edit should feel like the same person, placed inside a better story.
Common Cinematic Portrait Edit Mistakes
Even a beautiful photo can fail if the Cinematic Portrait Edit becomes too aggressive. The biggest mistake is over-editing. Too much teal, too much contrast, or too much skin smoothing makes the portrait look artificial.
Avoid these common errors:
-
Applying a preset at full strength without adjusting it.
-
Making shadows too blue, which dulls natural skin.
-
Over-smoothing the face and removing real texture.
-
Adding heavy vignettes that look like dark corners.
-
Using excessive clarity, which can make skin look rough.
-
Editing every photo with the same color grade.
Cinematic presets can help, but they should support your photo, not replace your judgment. Adobe notes that portrait presets balance light, exposure, and color to preserve skin tone while enhancing mood. Use presets as starting points, then personalize every Cinematic Portrait Edit.
Quick Workflow for a Cinematic Portrait Edit
Here is a simple repeatable workflow for a clean Cinematic Portrait Edit:
-
Choose a photo with clear eyes and usable light.
-
Correct white balance, exposure, highlights, and shadows.
-
Add gentle contrast with a soft tone curve.
-
Apply teal to shadows and warm orange to highlights.
-
Mask the skin and refine texture, clarity, and color.
-
Brighten the eyes and add subtle local light on the face.
-
Add a soft vignette and slight film grain.
-
Compare with the original and export at high quality.
This process works in Lightroom, Photoshop, Snapseed, Lightroom Mobile, and many AI editing apps. The tools may differ, but the logic remains the same: control light, protect skin, and build mood. With practice, your Cinematic Portrait Edit will become faster, more consistent, and uniquely yours.
PROMPT

Create a 3:5 vartical ratio ultra-realistic cinematic Indian cinema fan poster using my uploaded face as the exact identity reference. Keep my facial features and bone structure 100% identical. Show a large detailed close-up portrait with a smaller full-body version wearing a deep red shirt, black trousers, white sneakers and black sunglasses. Add dramatic crimson watercolor splashes and paint drips on a clean white background, with sharp details and a premium poster look.
A vertical fullbody selfie shot of a stylish young Indian man same face upload image face match 100%, with voluminous smiling warmly while taking a mirror selfie with a modern smartphone. He is wearing a black buttons shirt, black pant, white sneakers, blue smart watch, Perched playfully on his right shoulder is an ultra-cute, fluffy 3D Pixar-style baby cartoon animal (husky/cat mix) with big sparkling eyes and paws resting on him. Pitch black solid background accented with a glowing illustrated butterfly, a floating doodle heart, and subtle motion dashed lines. Clean studio lighting, sharp focus, 8k resolution, photorealistic blend with 3D animation, hyper-detailed. 3:5 vartical ratio, place the entire subject exactly in the visual center of the canvas centered both horizontally and vertically, around the 50% x 50% position. Do not place the subject near the bottom, lower third, or lower half. Keep equal negative space above and below the subject. Keep the subject relatively small, occupying only about 60-70% of the overall canvas, while maintaining a perfectly balanced centered composition.